Creating renderings for clients is an essential part of the interior design process. It allows clients to visualize the final outcome of a project before any physical work begins. While renderings are produced digitally by most design companies, using outside rendering sources, my approach is ENTIRELY DIFFERENT. I produce my designs by drawing my thoughts in a 3D perspective concept rendering, which ultimately represents the design I have created.
Understanding the Client’s Vision
The first step in creating a rendering is understanding the client’s vision. This involves detailed discussions with the client to understand their preferences, needs, and expectations. I ask questions about their lifestyle, color preferences, and any specific elements they want to include in the design. This helps me create a design that is tailored to their unique tastes and preferences.
Gathering Measurements and Photos
Once I have a clear understanding of the client’s vision, I gather data. If it’s a new build, then the architect’s plans tell me all I need to know. If it’s a renovation, we take measurements and photos of the space. Accurate measurements are crucial for creating a realistic rendering. I use tools like laser distance meters and measuring tapes to ensure precision. Photos of the space help me understand the existing conditions and any architectural features that need to be incorporated into the design.
Creating a Floor Plan
With the measurements and photos in hand, I create a detailed floor plan. This is the foundation of the rendering and includes all the dimensions and layout of the space. My drafts-person uses AutoCAD to draft the plan I have provided which can be easily modified as needed.
Selecting materials and Finishes
Before “rendering,” I make selections materials and finishes. This includes everything from flooring and wall colors to furniture and accessories. I choose materials and finishes that match the clients vision and budget. I also consider factors like durability and maintenance to ensure that the design is practical as well as beautiful.

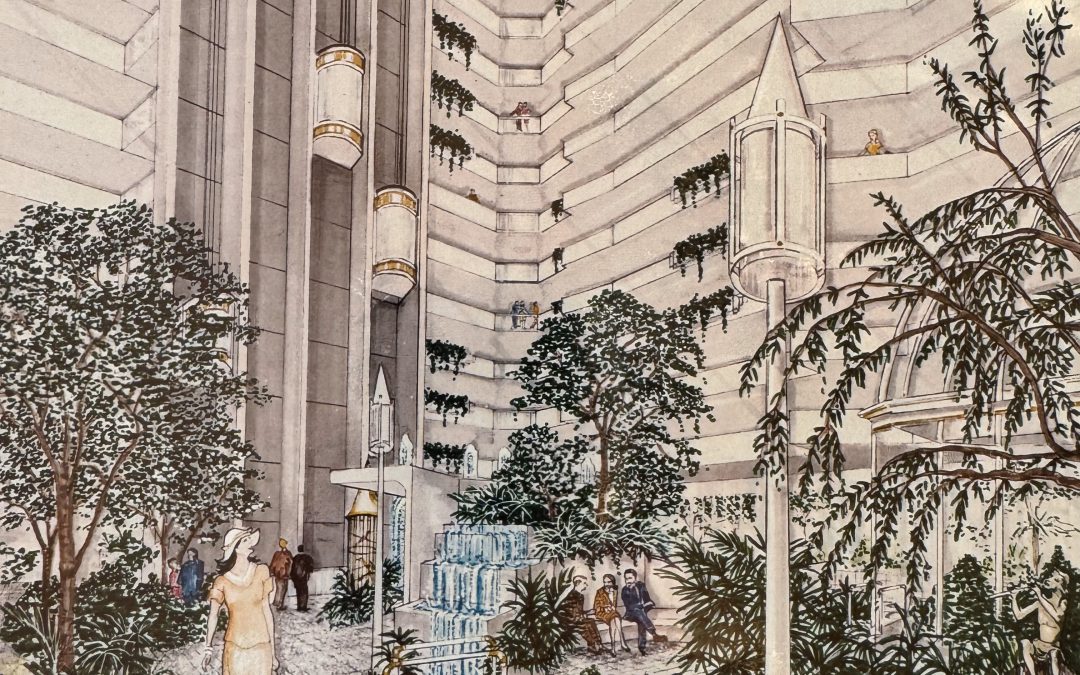
Creating the Rendering
Once the floor plan and materials are selected, I create the rendering. My renderings are largely done by hand using pencil for drafting and then finishing with various media including colored ink, markers, and pencils.
Revising And Finalizing
After creating the initial rendering, I review it with the client. This is an important step as it allows the client to provide feedback
Creating renderings is a complex and detailed process, but it is essential for ensuring that the client can envision and be inspired by my design presentation. This not only helps the client visualize the final outcome but also ensures that the project runs smoothly from start to finish.
Your renderings are like art. Did you go to art school to learn how to do this, Mary?
These renderings are amazing.
I love the way you create these images that show how it will be in the future.